
Service for the liquid damage to an iPhone or iPod isn’t covered by the Apple one-year limited warranty or an AppleCare Protection Plan (APP).
Find out if liquid damaged your iPhone or iPod
If liquid damages an iPhone or iPod (for example, coffee or a soft drink), the service for the liquid damage isn’t covered by the Apple one-year limited warranty or an AppleCare Protection Plan (APP). iPhone and most iPod devices that were built after 2006 have built-in Liquid Contact Indicators that will show whether the device has been in contact with water or a liquid containing water.
iPhone and most iPod devices are equipped with Liquid Contact Indicators (LCIs) that you can see from the outside.
An LCI will activate when it contacts water or a liquid containing water. The indicator’s color is normally white or silver, but when it contacts water or a liquid containing water, it will turn fully red. An LCI won’t activate because of humidity and temperature changes that are within the product’s environmental requirements.
To find out if the LCI in your device contacted liquid, find your product in the table below and locate the LCI or LCIs in your device. To help you see the LCI, use a lighted magnifying glass and angle the light or the device until you can see the LCI.
This table shows where the indicator (or indicators) are and how they look after being exposed to liquid:
| Product | Liquid Contact Indicator location |
| iPhone 7, iPhone 7 Plus |  |
| iPhone 6, iPhone 6 Plus, iPhone 6s, iPhone 6s Plus |  |
| iPhone 5, iPhone 5C, iPhone 5s, iPhone SE | 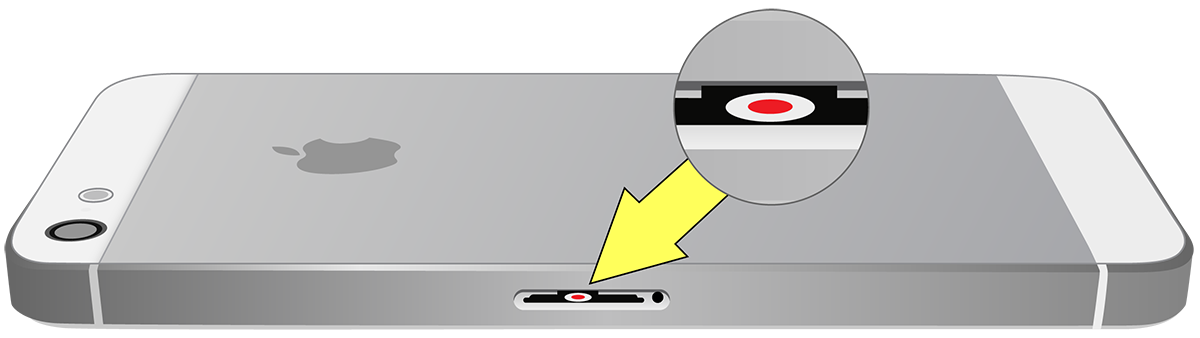 |
| iPhone 4, iPhone 4s |  |
| iPhone 3G, iPhone 3GS | 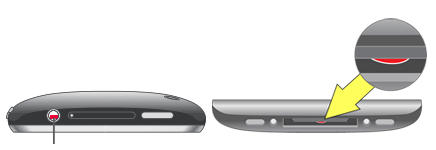 |
| iPhone | 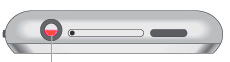 |
| iPod touch* | 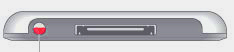 |
| iPod nano* | 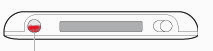 |
| iPod classic | 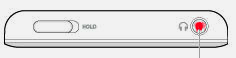 |
| iPod shuffle (3rd generation) |  |
Please note that the LCI will only work when sudden moisture changes occur such as water spillage or dropping in a large body of liquid. For example if the iPhone is continuously used on a regular basis to read books or listen to music in a bathroom setting, the indicator will become accustomed to the gradual moisture changes and will not indicate. If you are still unsure of whether your Apple product has sustained liquid damage, contact Duotech for support.
For more information, visit http://duotechelectronics.co.uk/
